

Url: http://wilderminds.blob.core.windows.net/downloads/scrollingregion…
I got a request today to explain how the scrolling region works that I use on my Silverlight page. Instead of using a complex example (like showing you that code) I decided to create a really simple example.
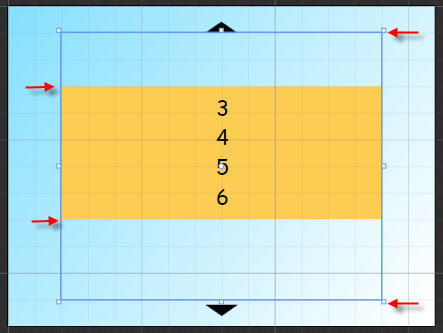
The trick to creating a scrolling region is to create a Canvas with a Clipping Path (you can do this with Expression and I have a video that shows how here). So the Canvas with a clipping region essentially is a window to a larger set of content. For example here is a simple canvas with a clipping mask. The arrows on the left show the size of the clipping region (the window into the the object) and the arrows on the right show the full size of the object itself:
To create a scrollable region, you wil just move the elements inside the clipping region canvas. For example:
<Canvas Name="theClipRegion" Clip="..." ...>
  <Canvas Name="theCanvas">
    ... Your Content
  </Canvas>
</Canvas>
In this example, when you click on the arrows it simply adds or subtracts 10 from the Canvas.Top of the “theCanvas” to move it within the Clipped Canvas. You don’t need to move the clipping region because that’s a window on the content within so you don’t move the window, but the content inside.
You can get fancy and use an animation to do so (like I did for the Silverlight page) or something simple like this. It works vertically or horizontally. Grab the code and check it out!
